Custom nameservers allow you to customize how people see domains that are hosted on your server. Custom nameservers must be defined at your domain registrar before you can use them with your websites. The following tutorial will show you how to add a custom nameserver through the Account Management Panel. After that, this guide will show you where to add the custom nameservers in WHM so that any created account will use those nameservers.
Related Articles
Set Up Vanity Nameservers
Update Domain Nameservers
Using Custom Nameservers
Adding Custom Nameservers in the Account Management Panel (AMP)
IMPORTANT: Custom nameservers can only be created and configured on our VPS+ hosting plans. Resellers can use vanity nameservers instead.
IMPORTANT: This solution will require root access. If this needs to be obtained, follow the guide on requesting root access.
NOTE: Remember that in order to use the Account Management Panel (AMP) to add the custom nameservers, the domain name would need to be registered through InMotion Hosting.
- Log into AMP
- Click on Domains>Manage Domains at the top of the page
- Click the name of the domain that you would like to use under Domain
- Click on Create custom nameservers
- Navigate to Add name servers section, then add the custom nameservers using the assigned IP address
EXAMPLE: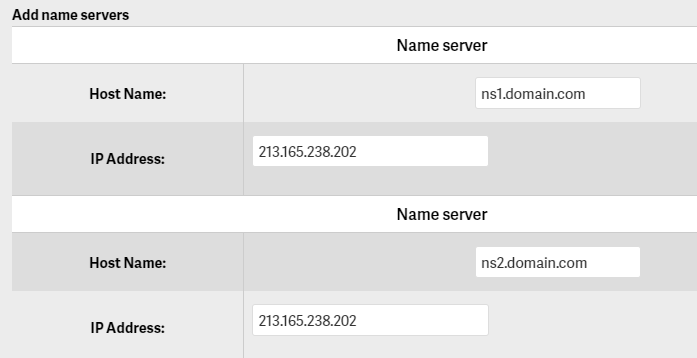
REPLACE: Replace domain.com with the appropriate domain. Replace the IP Address with the IP Address assigned to the hosting.
TIP: If the IP address assigned to the server hosting is unknown, it can be found under Account Technical Details.
CAUTION: This step will create the glue records for the custom nameserver. If the domain is not hosted with InMotion Hosting, the glue records will need to be created through the domain's registrar. - Click on the Submit button
Adding the DNS Records
- Log into cPanel of the appropriate domain
- Navigate to the Zone Editor, located under the Domains section
- Next to the domain to be used for the custom nameservers, click the +A Record button
- In the Add an A Record popup, enter the following values:
-
Name: ns1
NOTE: The domain name will be automatically appended once you click away from this box. -
Address: the IP assigned to the server
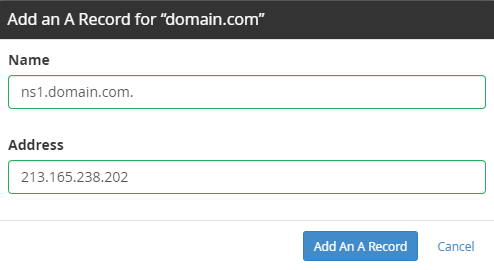
-
Name: ns1
- Click the Add An A Record button
- Repeat the above steps for ns2
Selecting a Custom Nameserver
IMPORTANT: This step will require root access. If this needs to be obtained, follow the guide on requesting root access.
- Log into Root WHM
- Navigate to Nameserver Selection, under Service Configuration
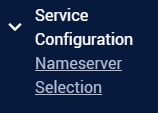
- Select PowerDNS or BIND and click Save
NOTE: PowerDNS is the default choice.
TIP: Once the nameserver service has been selected, the new custom nameservers can be applied to a domain on the server.
Select the Default Nameserver in WHM
NOTE: If desired, the default nameserver for the server can be modified, so that any new cPanel accounts created will use the custom nameserver.
- Log into WHM
- Navigate to Basic WebHost Manager Setup, located under Server Configuration
- Select Explicitly Set the Nameservers and enter the custom nameservers
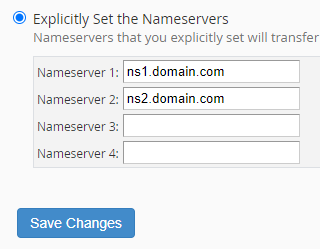
REPLACE: Replace domain.com with the appropriate domain. - Click on Save Changes
IMPORTANT: If in Root WHM, the root account's default nameservers can be modified under Basic WebHost Manager Setup in the Nameservers section.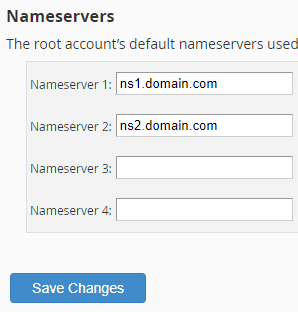


Comments
0 comments
Article is closed for comments.